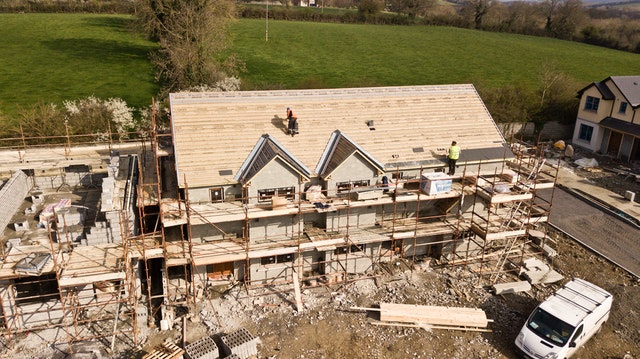
Construction time lapse is the process of taking photos of a construction project or video from beginning to end. Thousands of images are then combined to make a 1-minute video that shows the entire process from start through finish. It can be a very long video with specified settings for time-lapse.
Photos are then magically stitched together to create a step-by–step video of the construction process. If it involves video, it will be edited to give the best time-lapse product.
What Do You Need To Do Time Lapse
Time-lapse videos show the creation process from start to finish. You can use them to show time progress or as a short video tour of a facility or property. What do you need to know to do construction time-lapse work?
It would be best if you first decided what equipment you will use. You can use a DSLR, mirrorless camera, or Go Pro, as well as a custom time-lapse photography camera. There are even time-lapse cameras made for construction sites.
An essential tripod is a good choice, or a stable location is a perfect option. Time lapses that are consistent with your photos will be more effective.
You will also need equipment that can automatically tell the camera to take multiple photos. You can program an intervalometer to say to the camera to take pictures at any interval you choose. Consistency is important here, and automating the intervals at which you will take your photos will ensure a consistent pace throughout the time-lapse.
Setting Up the Construction Time Lapse
We have already written about the problems associated with using a DIY camera to record large-scale construction projects. However, it is not always good to buy a complete construction camera system for every project. With a bit of planning and some math, anyone can record their experience on small projects.
Time-lapse photography is an excellent way of documenting a construction project. Before you can start a time-lapse, you will need to answer some questions.
Locations
You should be able to see the entire building, and it is essential. Imagine taking photos of a construction project over some time only to discover that the building has grown beyond your view during the later stages. Cameras should be accessible for maintenance and repair but not too accessible to allow someone to nick them.
Connectivity
You can mooch off open wireless networks that have strong signals from your property if you have them. You can also purchase your DSL or cable connection and create a shelter on-site.
Power
Because it kills, both the power and connectivity, power-over-ethernet (PoE) can be the best way to get your device running. You can still do PoE if you don’t have the power or do it on your property. However, you can connect power to your site through a temporary power strike.
Image Quality
You can achieve a variety of image quality levels in a time-lapse project. You decide whether you require streaming video. If you do, you will need either a streaming server embedded in the device or at least stream it to a computer via USB.
Video Monitoring
If you decide to have video monitoring capabilities, you can choose between megapixel webcam quality or 640×480 security cameras. While megapixel cameras can be more costly, it is still recommended that you have one, and it is too small to capture clear images at 640×480 resolution.
Making It Work
Now you are ready to begin recording your time-lapse.
Before you start your construction project, turn on the camera to ensure everything is working correctly.
You should hear the shutter click and see the camera taking photos at the time programmed on the intervalometer.
Turn on the camera for the duration and start of your work. Then, please turn it off at the end.
Charging the battery every night to ensure that the camera doesn’t run out of power while you are recording.
These steps will help you create a stunning time-lapse video.
Time-Lapse Tips and Tricks
Here are some more tips to help you get started with your time-lapse image recording
- To ensure you get the desired effect, do a quick test using a few images.
- You can relax once you start taking photos. However, make sure to regularly check the viewfinder to ensure that no changes in lighting, wind or any other conditions have affected your shot.
- You can quickly adjust the shot if you feel it is needed. It will avoid having to retake the photo. It would be best if you thought in millimeters and not in inches when making adjustments.
- After taking your images, use your software editor to colorize, sharpen or blur the video.
- If you are taking generic images and don’t use them in your client’s video, you should try to get permission to archive any photos you don’t need for future videos.
It takes some planning and extra project time to create time-lapse videos, and they can be a significant visual element that will make your corporate video stand out if done right. You can also learn time-lapse video sequences and enhance your corporate videos.
IMPORTANCE of Time Lapse Equipment, Video Format, and Shutter Speed
It would be best to look for a time-lapse camera that can set the time interval for auto-photo-shooting and input the data needed to calculate the length of the finished time-lapse video. Some cameras can even stitch the images together to create the video.
The format of the images that you will be using is another critical decision. RAW is the best format, but JPG can store twice as many images on one memory card. Some cameras let you shoot in sRAW+ sJPG. There is no one right format. You should consider your memory limits and your quality standards when choosing the best format.
You will need a tripod and the right lens to capture the images you want. To avoid unusable shots due to the camera constantly changing the focus, make sure you turn off Auto Focus. A higher shutter speed will result in less fluidity of movement in the final video. A good rule of thumb for activity shots is to set the shutter speed at half of the interval. For example, a shutter speed setting of 1.8 will work well for a 4-second interval.
CamDo can assist you with all of your time-lapse construction camera needs. So, what are you waiting for? Contact them today!